Two Brilliant Ways to Use Leather Dye in Your Home
Leather dye is a versatile and affordable solution for refreshing and matching all kinds of leather goods in your home. Studies have shown that using leather dye can provide a range of benefits for your leather, from improving the appearance of leather items to protecting them from further damage. It’s both a cost-effective and environmentally friendly solution, which can help extend the life of leather items, making it a great option for those looking to revamp or redesign their leather items.
From furniture and accessories to styling different clothing and starting new DIY projects, there are countless ways to use leather dye to breathe new life into your items. Here are two easy and creative ideas to inspire your next leather dyeing project.
- Redesigning Old Furniture with Leather Dye
Leather dye is an easy and inexpensive solution to breathing new life into your old furniture. From sofas and armchairs to ottomans and loveseats, leather dye can help you transform faded and worn leather into sleek, modern pieces that complement your décor perfectly. Here’s a step-by-step guide on how to polish your furniture with leather dye.
Materials needed:
- Leather dye
- Leather Prep / Cleaner
- Leather care
- Sandpaper
- Soft cloths/brushes
- Masking tape (optional)
Step 1: Clean and prepare the leather
The first step in refurbishment is to clean the leather surface. Use a leather prep cleaner to remove dirt, oil and grime that has built up over time. Then dry the leather thoroughly with a soft cloth.
Step 2: Sand the Leather Surface
Next, lightly sand down the surface of the leather with sandpaper. This will allow the paint to adhere to the leather better and provide a smooth, even finish. Be sure to sand in the direction of the grain and be careful not to sand too deeply or you will damage the leather.
Step 3: Apply the leather dye
After the leather has been cleaned and sanded, it’s time to apply leather dye. Shake the bottle well first to ensure the paint is well mixed. Then use a soft cloth or brush to apply a thin, even coat of paint to the leather. Be sure to work in small sections, as you want to avoid dripping or smudging the paint. If you’re drawing intricate patterns or designs, consider using masking tape to create clean and precise edges.
Step 4: Wait for the paint to dry
Let the leather dye dry completely before applying a second coat. Most leather dye will dry within a few hours, but it’s best to wait at least 24 hours before touching the furniture.
Step 5: Condition the Leather
After the paint dries, use a leather conditioner to restore softness and lustre to the leather. This also helps prevent the leather from cracking and fading over time.
Step 6: Enjoy your transformed furniture
Once the conditioner has soaked into the leather, your furniture is ready to use! You’ll be amazed by how a simple coat of leather dye can transform a worn piece of furniture into a stylish and modern focal point in your home.
In conclusion, refurbishing old furniture with leather dye is a great way to breathe new life into your leather items. Whether you’re looking to spice up your decor, add a pop of colour, or just freshen up a tired piece in a redecorated room, leather dye is a versatile and affordable solution that can help you achieve your goals.
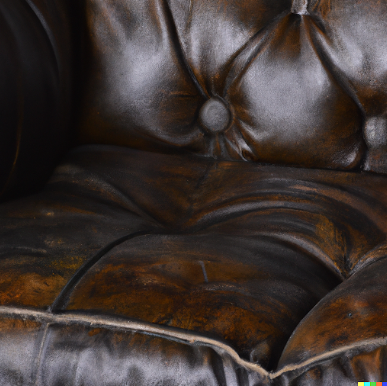
- Repairing Scratches and Scuffs on Furniture with Leather Dye
Are you looking for ways to restore your leather furniture? Leather furniture is a popular choice for many homes because of its sleek look and durability. However, over time, even the best-maintained leather can get scratched and scuffed. But instead of replacing or covering it up, you can easily fix these cosmetic issues with leather dye.
Materials needed:
- Leather dye
- Sandpaper
- Leather Prep Cleaner
- Soft cloths/brushes
- Masking tape (optional)
Step 1: Clean the scratched or worn areas
The first step in repairing scratches and scrapes is to clean the affected area. Use a leather prep cleaner to remove dirt, oil and grime that has built up over time. Then dry the leather thoroughly with a soft cloth.
Step 2: Sand the affected area
Next, use sandpaper to gently scuff the surface of the leather around the scratched or scuffed area. This will help the paint adhere better to the leather and ensure a smooth and even finish. Make sure to sand in the direction of the grain and be careful not to sand too deeply, as this could damage the leather.
Step 3: Apply the leather dye
Once the leather has been cleaned and sanded, it’s time to apply the leather dye. Start by shaking the bottle well to ensure that the paint is thoroughly mixed. Then, use a soft cloth or a brush to apply a thin and even layer of paint to the scratched or scuffed area. Be sure to work in small sections, as you want to avoid dripping or smudging the paint. If you’re painting intricate patterns or designs, consider using masking tape to create a clean and precise edge.
Step 4: Wait for the dye to dry
Allow the leather dye to dry completely before applying a second coat. Most leather dyes dry to the touch within a few hours, but it’s best to wait at least 24 hours before handling the furniture.
Step 5: Enjoy your repaired furniture
Once the paint has dried, your furniture is ready to use! You’ll be amazed at how a simple coat of leather dye can hide scratches and scuffs and restore the look of your furniture.
In conclusion, repairing scratches and scuffs on furniture with leather dye is a quick and easy solution for fixing cosmetic issues on your leather belongings. Whether you’re looking to match your décor, add a pop of colour, or just refresh a tired piece, leather dye is a versatile and budget-friendly solution that can help you achieve your goals. So why not give it a try today and see what you can come up with?